Play Training
Set Client Geographic Areas
Number of Guide Steps: 9
Creating client geographic profiles is a crucial step in refining audience insights and optimizing campaign targeting.
Within this multifaceted platform, Geo Profiles are the indispensable tools meticulously crafted to serve two primary objectives: the acquisition of Audience Insights and the delineation of precise marketing areas for client campaigns.
The beauty of Vision VX lies in its adaptability, allowing you to create a multitude of Geo Profiles, each meticulously calibrated to fulfill distinct insights and campaign purposes.

- 1. Accessing Client Geographic Profiles
- 2. Locating Business Locations and Geo Profiles
- 3. Adding a New Geo Profile
- 4. Naming the Geo Profile
- 5. Choosing Geo Profile Type
- 6. Defining Geo Areas
- 7. Saving the Geo Profile
- 8. Using the Interactive Map
- 9. Setting Default Geo Profile
Accessing Client Geographic Profiles.
Navigate to the client information tab located at the top of the client page. It will appear as a button labeled Client Info. Upon pressing it you will be directed to the Client Information screen.

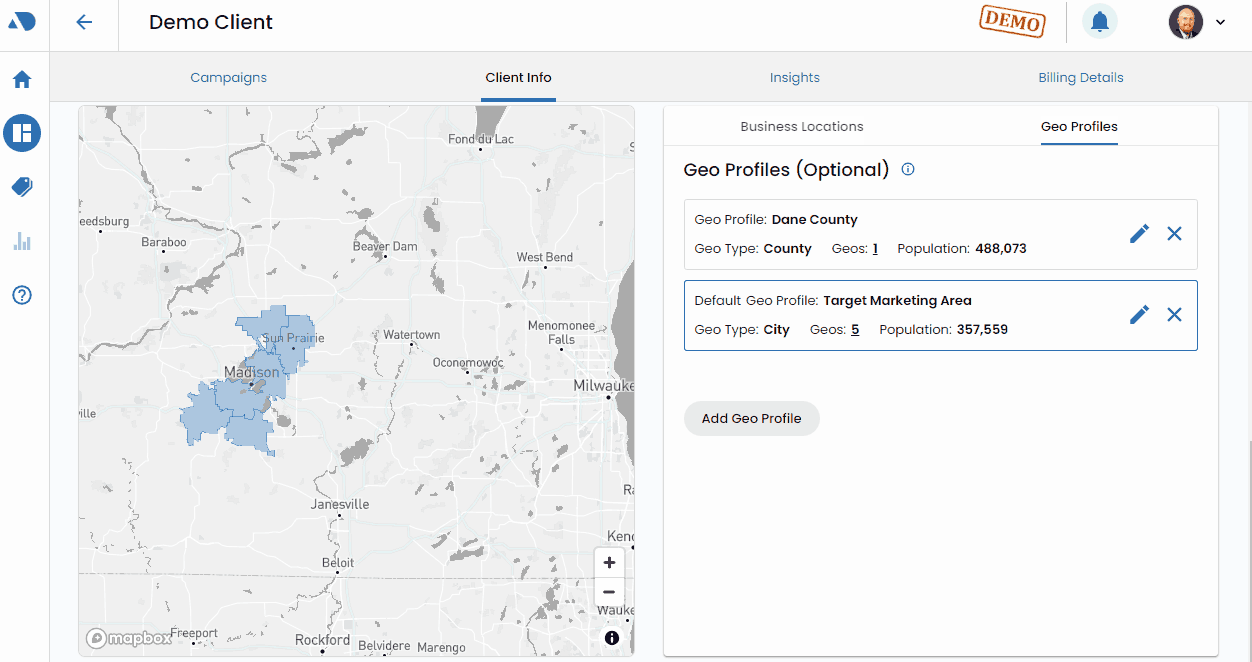
Locating Business Locations and Geo Profiles.
Scroll down to the business locations and geo profile areas, then click on the geo profiles tab.

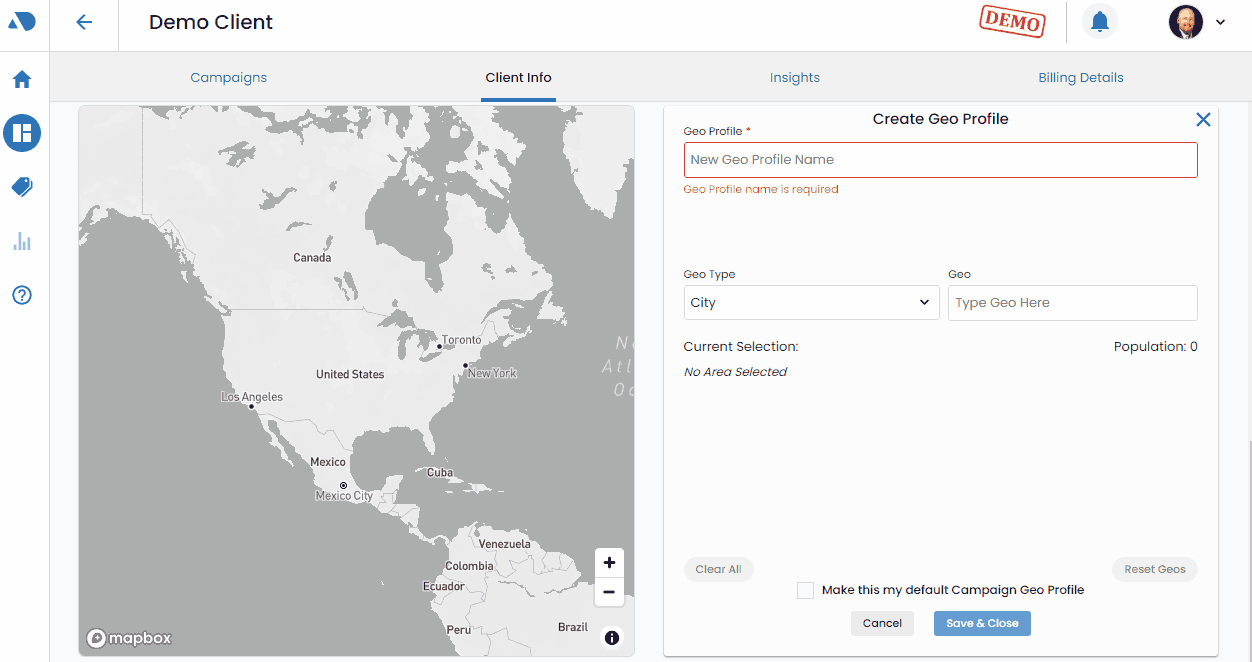
Adding a New Geo Profile.
Click on the "Add Geo Profile" button to initiate the creation of a new geo profile.

Naming the Geo Profile.
Provide a clear and descriptive name for the geo profile. This name should be easily recognizable for future reference, such as "Target Market Area."

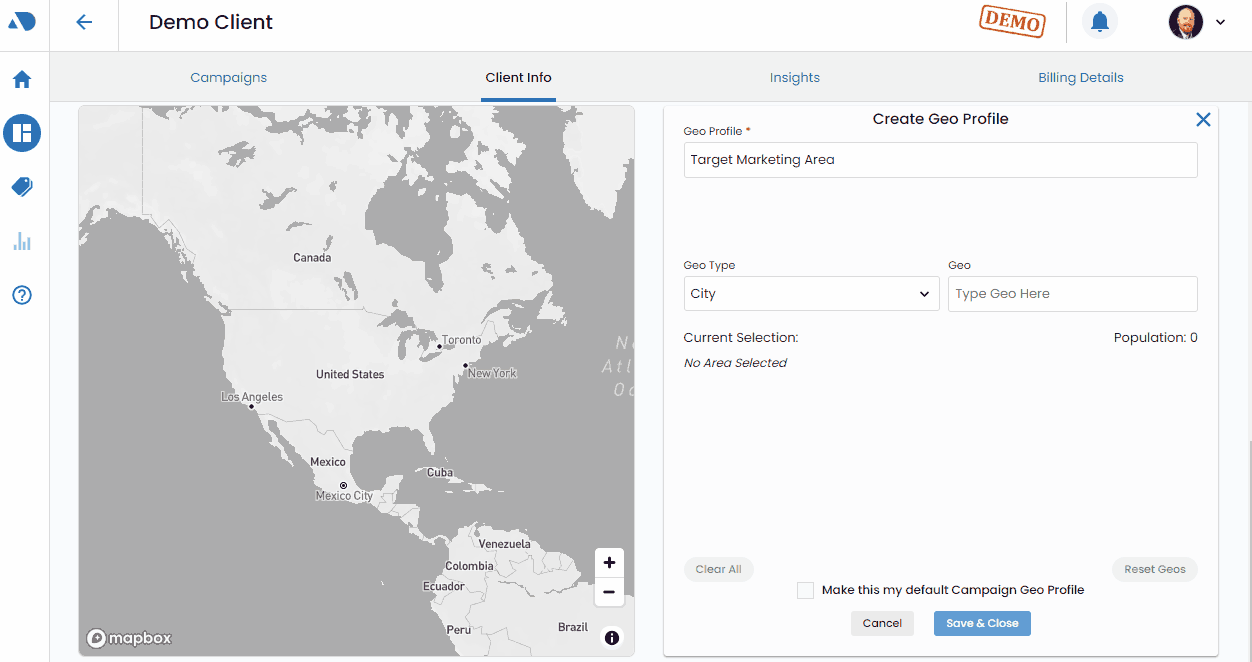
Choosing Geo Profile Type.
Select the type of geo profile you want to create, options include city, congressional district, county, DMA (Designated Market Area), state, or zip code.


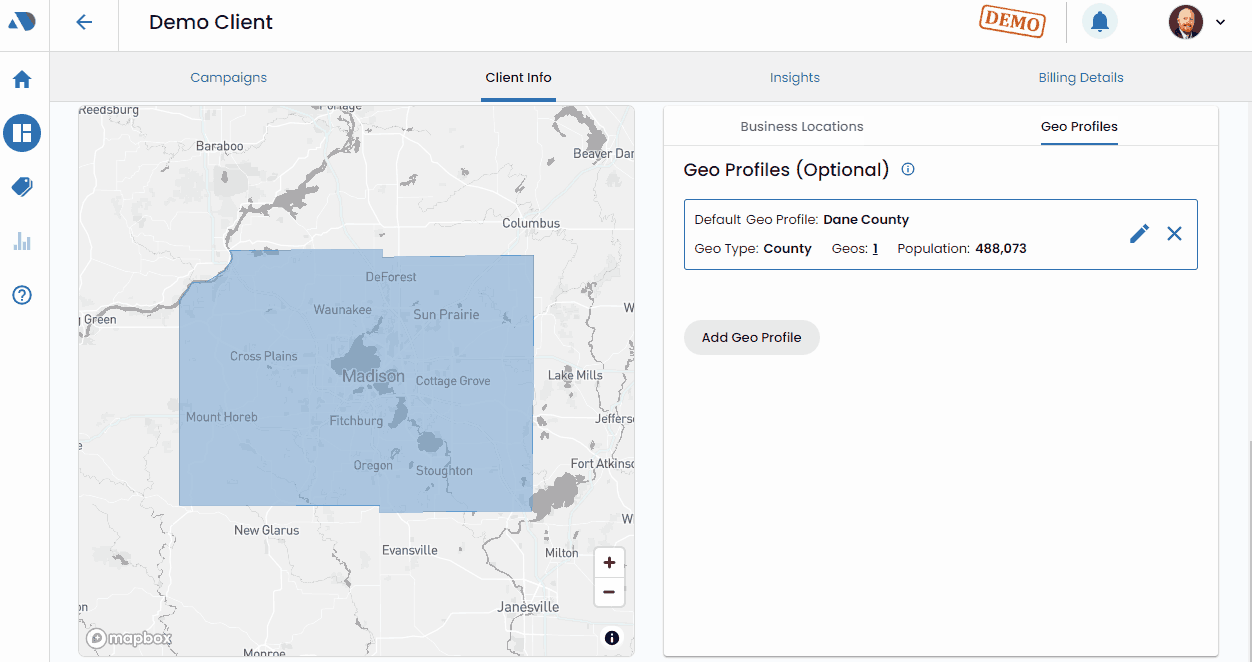
Defining Geo Areas.
- After selecting a geo type, the map will refresh, displaying the nearest area to the client location.
- To add more areas, use the Geo box to search. Typing will prompt suggestions that you can click on.

Saving the Geo Profile.
Continue adding geo areas as needed, ensuring that your selections align with your targeting strategy. When satisfied with your selections, click "Save and Close" to save the newly created geo profile.
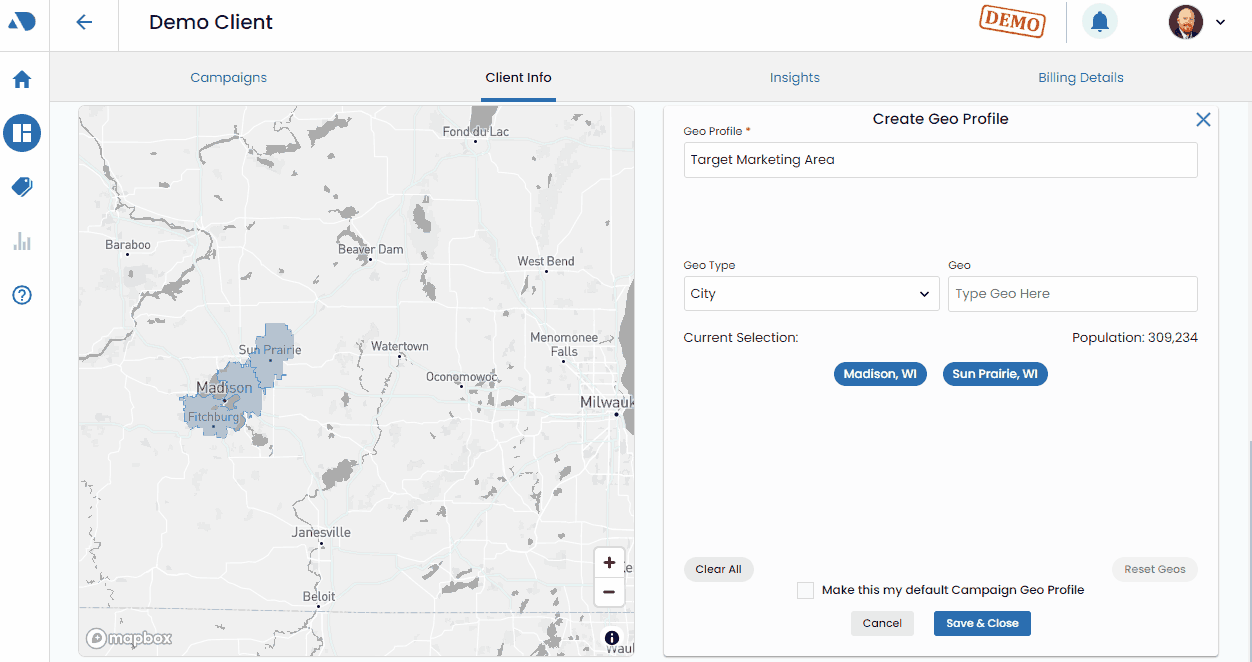

Using the Interactive Map.
Alternatively, use the interactive map. Click once on the desired area to review information, and click again to reveal the Plus symbol. This symbol adds the selected area to your geo profile.
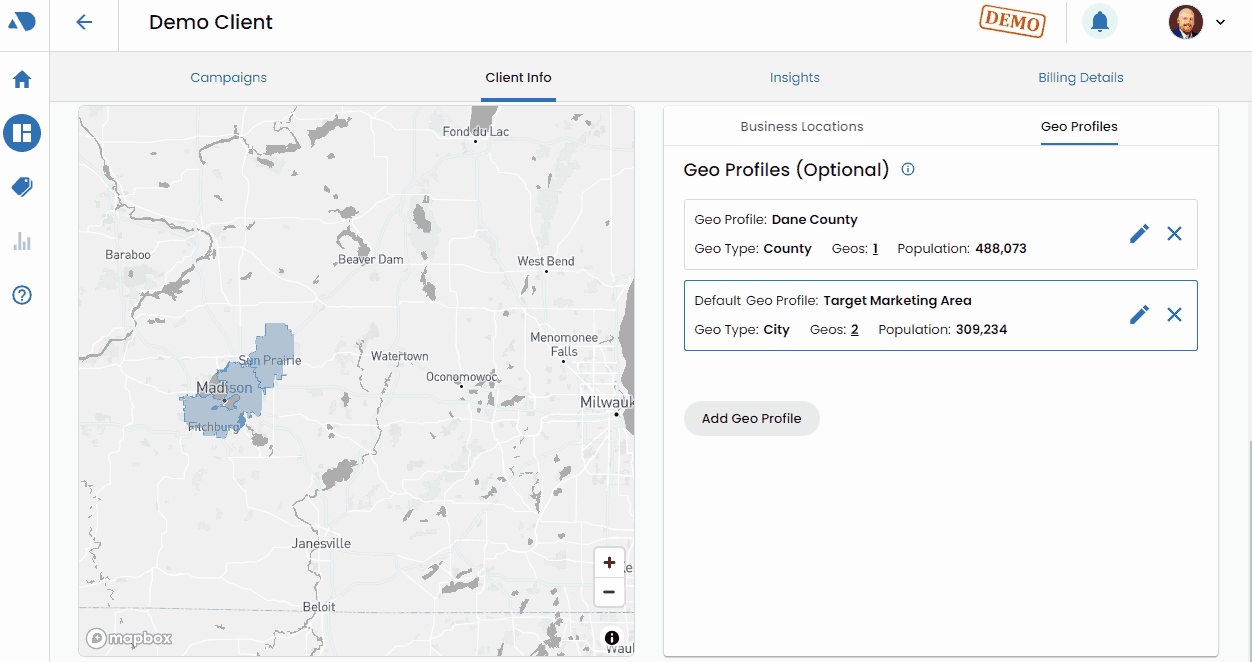

Setting Default Geo Profile.
Optionally, you can designate this profile as the default for campaigns by using the checkmark option. This streamlines the targeting process for future campaigns.
By following these steps, you can efficiently set up client geographic profiles, enabling more effective audience insights and targeted campaign strategies.